1. Create your VR app in the InstaVR Console as you normally would, adding Scenes, Navigation Links, Hotspots, etc (Here’s our Intro Guide for Creating VR Apps).
2. Select the Scene you’d like the Quiz to be added to by clicking on the scene’s thumbnail on the left side of the Console.
3. Then press the “Quiz” button in the upper right of the Console.

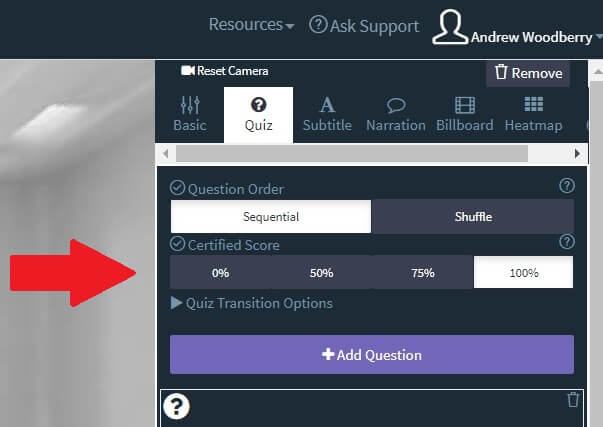
4. If adding multiple questions to the scene, choose if you’d like them to be Sequential or Shuffled.
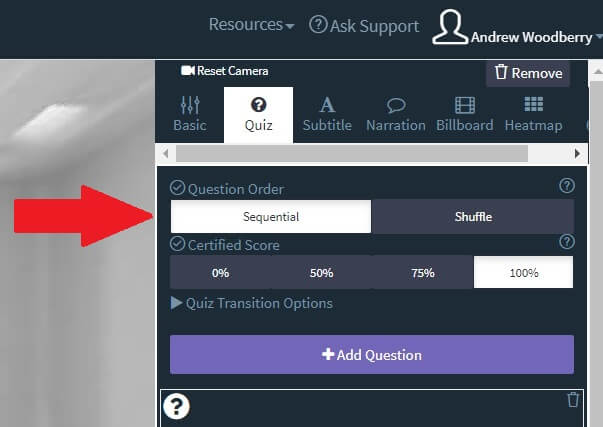
5. Choose the % that need to be answered correctly for the quiz taker to be “Certified” as successful.
6. Choose what happens after questions are answered. The options are: Navigate to a new specific scene (then select the destination by pressing the + Click to Add Question Destination button), Have the user repeat the quiz if not certified, or go Back to Home. The default if no scene is selected for navigation is returning to the scene where the quiz appeared.

7. Add your 1st Question. You can optionally add an image to be displayed above the question.

8. Select the # of choices the user will see. You can add up to six answers.

9. Select the correct answer choice.
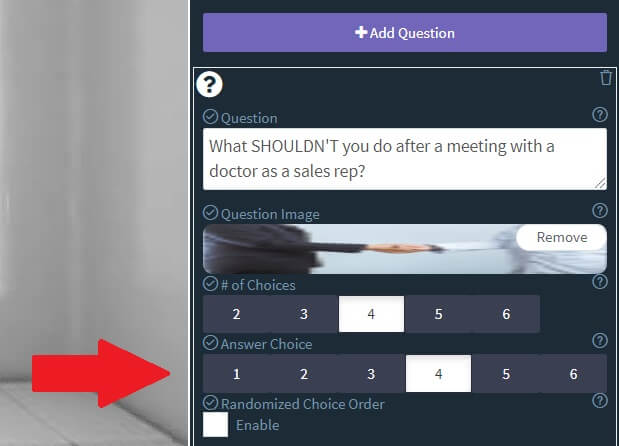
10. Check the box next to Enable if you’d like the answer options to be presented randomly. Otherwise, don’t check the box if you’d like them presented in the specific order you wrote them out.

11. Add the text for your answer choices.
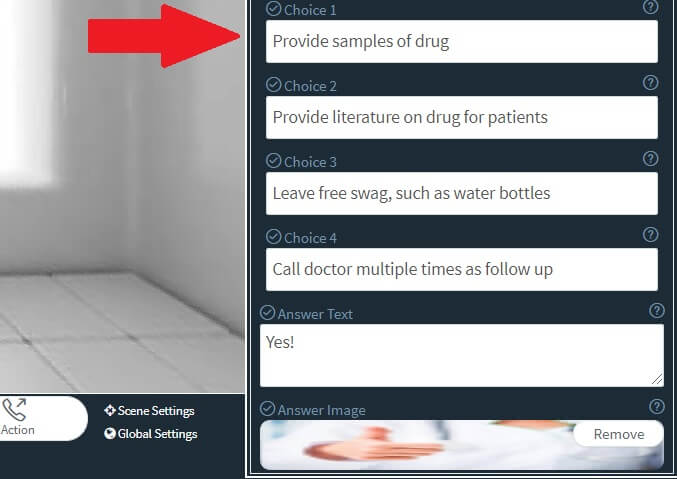
12. Optionally add an answer text when a user makes a selection. Otherwise, users will see a green check mark for the correct answer, red x for incorrect answers.
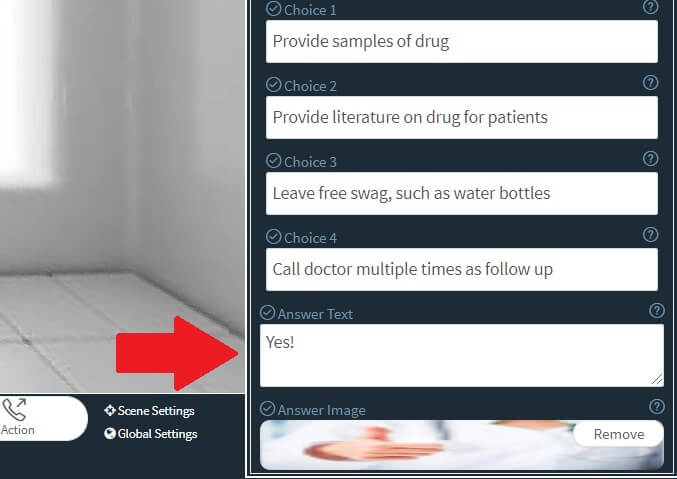
13. Optionally add an image to appear behind the green check or red x.

14. Once you’ve completed setting up your quiz, it’s good to look at the quiz in action. The fastest way to do this is go to Package -> WebVR -> Press “Make Package for Web” -> Download -> Press “Open Hosted Page” -> Navigate to the Scene that has the Quiz -> Take Quiz
Comments
0 comments
Please sign in to leave a comment.